
How to draw realistic hair

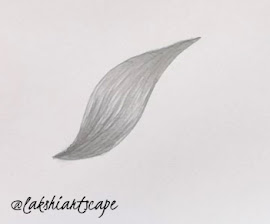
Step 1:
Draw the outline of the hair clump in the direction you wanted your hair flow to be and you can so the hair strokes.

Step 2:
There are 2 ways you can go about shading
1- Dark to light:
Shade the darkest area first with dark shades and move gently to light area with less pencil pressure for light shades.
2. Light to dark areas:
Shade the light areas first gently and then move on to the darkest area with high pressure to get dark shades.
Hair – shading strokes flow along the different hair clump and folds direction and make the stroke visible and don’t blend it completely so that it will give you real hair effect and hold the pencil carefully don’t press too hard as you have to gradually increase the dark shade to avoid mistakes by making the mid tone darker It should be always lighter so that it will give you the perfect shiny look to your hair. So make sure to keep your mid tone lighter with distance between them and make some quick pencil strokes on the tip of the hair clumps to give an appearance of individual hair do this by pressing harder first and then pulling it away from quickly so you will get the natural and soft and shiny hair.


Step 3:
For curly and wavy hair you can draw two parallel lines and draw curvy lines as shown in the pic and draw another curvy line parallel to the curvy lines drawn already and join at the end part.


Step 4:
Erase the parallel lines and join at the curve ends as shown in the pic and you can do the hair strokes.

Step 5:
Let’s draw the braid hair by just drawing two parallel lines and draw zigzag lines inside the parallel lines and extend the lines from each zigzag corner’s as shown in the pic.


Step 6:
Now you can join the extended lines by small curvy lines and you get the perfect braided hair style and finally you can do the hair strokes as per strokes guideline in step 2.


0 Comments